Too often a single screen forces constant window switching, cramped virtual meetings, and eye strain. This guide shows how to turn one portable computer into a true workstation that reduces clutter and speeds up work. We start with clear goals and simple desk fundamentals, then lock in ergonomics before adding monitor(s), connectivity, cable management, lighting, and storage.
Expect practical advice that fits small rooms, budgets, and more advanced offices. The best solutions are not always the most costly; they support daily tasks, save time, and ease strain. You’ll also learn the “one-plug” approach so power, monitor, and peripherals connect fast and leave more time for actual work.
Whether you need a compact home arrangement, a budget upgrade with a used monitor, or a power-user build for deep focus and meetings, this guide adapts to hybrid schedules and varied tasks.
Define your workstation goals and daily tasks
Begin with a short audit of your daily tasks—this small step directs your whole workstation design. Note how much time you spend in meetings, deep focus, creative work, and admin. Keep the audit simple: percentage blocks or a quick list.
Map your workflow
List task types you perform: video calls, writing, spreadsheets, design, coding, or filing. These task mixes drive equipment choices. Meetings need clean lighting and camera placement. Creative work favors color-accurate displays and room for tools. Admin work benefits from speed and organization.
Decide what “powerful” means for you
A practical powerful workstation means less neck strain, faster context switching, fewer cables to plug in, and more screen space for side-by-side apps. Pick 2–3 measurable goals, for example:
- Reduce hunching while seated.
- Make docking take under 10 seconds.
- Keep the work surface clear each evening.
Choose the right setup intensity
Use a simple rule: occasional work home use can stay with an everyday arrangement and a single monitor. Frequent WFH calls for a dedicated home office with ergonomic investment. Remember: body size, vision, and task style alter the ideal plan.
“Good workstation design responds to real tasks, not trends.”
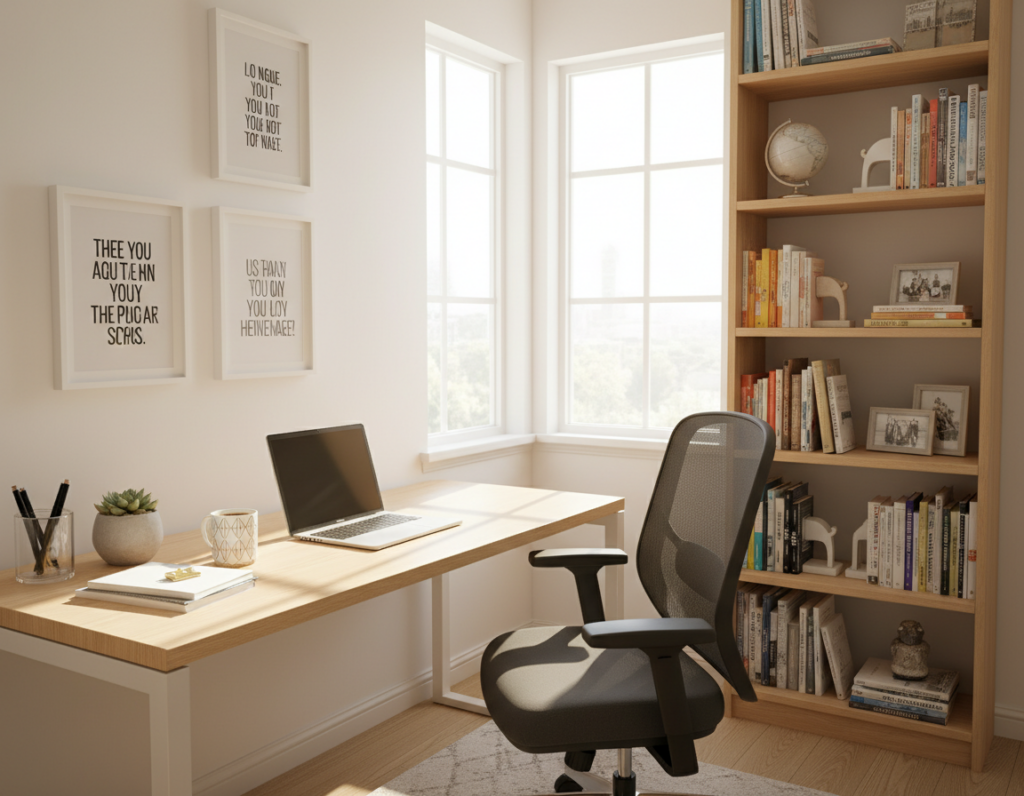
Choose the right desk for comfort, space, and stability
Choose a work surface that balances room, strength, and comfort—this single choice sets every other decision. The table you pick controls monitor distance, keyboard position, and whether items and accessories fit without crowding.
Pick desk dimensions that actually fit monitors and accessories
Aim for at least 60 cm (2 ft) of depth so a monitor can sit far enough from your eyes. Depth affects viewing distance and how much desk space remains for a keyboard and mouse.
Measure your real footprint: include a stand depth, keyboard/mouse area, and room for a lamp or notebook.
Prioritize build quality and a surface that supports your gear
Stability matters. A solid top reduces wobble with monitor arms or standing desks and protects electronics. Choose materials and joinery rated for steady daily use.
Allow room for common accessories—chargers, a phone dock, and a small organizer—so nothing blocks the primary work area.
Plan desk placement to reduce glare and improve focus
Place desks to avoid facing bright windows directly. Angle screens or use blinds to cut reflections on the display and keep light from washing out video calls.
Design simple zones on the surface: a primary work zone, a charging zone, and a writing zone. This reduces clutter and makes it easy to sit down and start.
“Choose size first, then style—function keeps you focused.”
- Desk size controls everything else: distance, layout, and what fits.
- Measure for the real footprint before buying.
- Plan zones to protect focus and reduce clutter.
Standing desk basics for better health and productivity
Short standing periods change how your body feels during the day. Alternating positions eases circulation, lowers numbness, and keeps energy steadier. Adjustable standing desks make switching simple and fast.
Start with a realistic ramp: stand 15–30 minutes, then sit for at least the same time. Gradually extend standing blocks as comfort allows. This gradual plan protects comfort and supports long‑term health.
How to alternate sitting and standing without fatigue
- Stand during phone calls or short meetings to boost alertness.
- Sit for highly detailed or precision tasks that need steady hands and focus.
- Use an adjustable height tool so the top of your monitor stays at eye level; standing without correct height removes benefits.
Anti-fatigue mats, footrests, and posture checkpoints
Comfort matters when you stand. A quality anti-fatigue mat reduces foot and leg strain on hard floors. Add a footrest or rail so you can shift weight and avoid twisting the back.
“Stand well, not just more.”
Posture checkpoints:
- Shoulders relaxed and down.
- Neck neutral, eyes level with the top third of the screen.
- Elbows close to the body and wrists straight.
Build your ergonomic foundation before adding accessories
Set a solid ergonomic base so accessories help rather than hide poor posture. Good ergonomics reduce strain and make long work sessions comfortable and sustainable.
Neutral posture targets: spine, shoulders, elbows, wrists
Neutral posture means your neck aligns with your spine, shoulders stay relaxed, elbows sit near your sides at about 90–120 degrees, and wrists stay straight while you type or use a mouse.
- Neutral spine: maintain the natural curve without slumping.
- Shoulders down and back: avoid hunching forward.
- Elbows close to the torso and forearms level.
- Wrists straight during keyboard mouse use.
Chair adjustability that matters most for long sessions
Choose a chair with a wide seat-height range, reliable lumbar support, adjustable armrests, and a stable base. These features let you match body geometry and keep comfort and health steady over hours of work.
Desk height and keyboard height alignment for reduced strain
Match desk height and keyboard position so your forearms stay level and shoulders don’t shrug. If the top surface is too high, lower the keyboard or raise the chair and add foot support.
“Fix posture first — the rest of the gear will fall into place.”
One-minute self-check: sit, relax shoulders, place hands on the keys, check elbows at about 90–120°, and straighten wrists. If any point feels strained, adjust chair or keyboard height before you begin work.
Once geometry is correct, raising your screen and choosing external screens or stands becomes simple and more effective.
Raise your laptop to eye level the right way
Raising the screen is the cornerstone move for reducing neck flexion and visible strain. When the top of the display sits near eye level, your head stays neutral and you avoid long bouts of looking down.
Laptop stand vs. a stack of books: which to use
A dedicated stand gives stability, airflow, and repeatable height. It works well for long-term use and keeps accessories tidy.
A stack of books is a valid short-term fix when traveling or on a tight budget. It lacks ventilation and fine adjustment, so use it only briefly.
Best screen position to reduce neck flexion
Aim to place the top third of the display at or slightly below eye level.
Allow for a natural downward gaze of roughly 15 degrees. That angle keeps the eyes relaxed while the neck stays neutral.
When a dock or hub simplifies your workstation
Use a hub or docks when you plug and unplug often, or when multiple peripherals and an external monitor are standard. A single connection makes arrival fast.
Docks also cut cable clutter and keep the surface cleaner so the main work area remains clear and comfortable.
“Raise the screen, then upgrade input devices—external keyboard and mouse make the elevation ergonomic.”
Next, swap to external input devices and consider adding a monitor. Those changes build on this raised-screen foundation to further reduce strain and improve comfort.
Upgrade your input devices for speed and comfort
A better keyboard and mouse transform how you sit, type, and move during work. Swapping to external inputs brings immediate gains: faster typing, fewer micro‑adjustments, and a steadier posture that reduces neck and shoulder strain.
Placement for healthier wrists
Keep the keyboard centered with your primary screen so your shoulders stay even. Place the mouse close to the keyboard to avoid reaching that tires the shoulder.
Wrist-friendly habits include neutral wrists, a light grip, and forearms parallel to the floor. Small changes stop fatigue across long sessions.
Why go wireless and how it helps
Wireless peripherals cut cable clutter and let you reposition items quickly. They free up desk space and make one-plug docking simpler when you move between locations.
Fewer wires also simplify cable management. Hide power and remaining cords with a tray or a single channel for cleaner lines on the surface.
Minimal gear baseline
- Compact external keyboard
- Comfortable mouse
- Optional desk pad to define a clear work zone
Together, good inputs plus increased screen area are what turns a portable screen into a full workstation. This combination boosts speed, reduces strain, and keeps accessories and items tidy for better long‑term use.
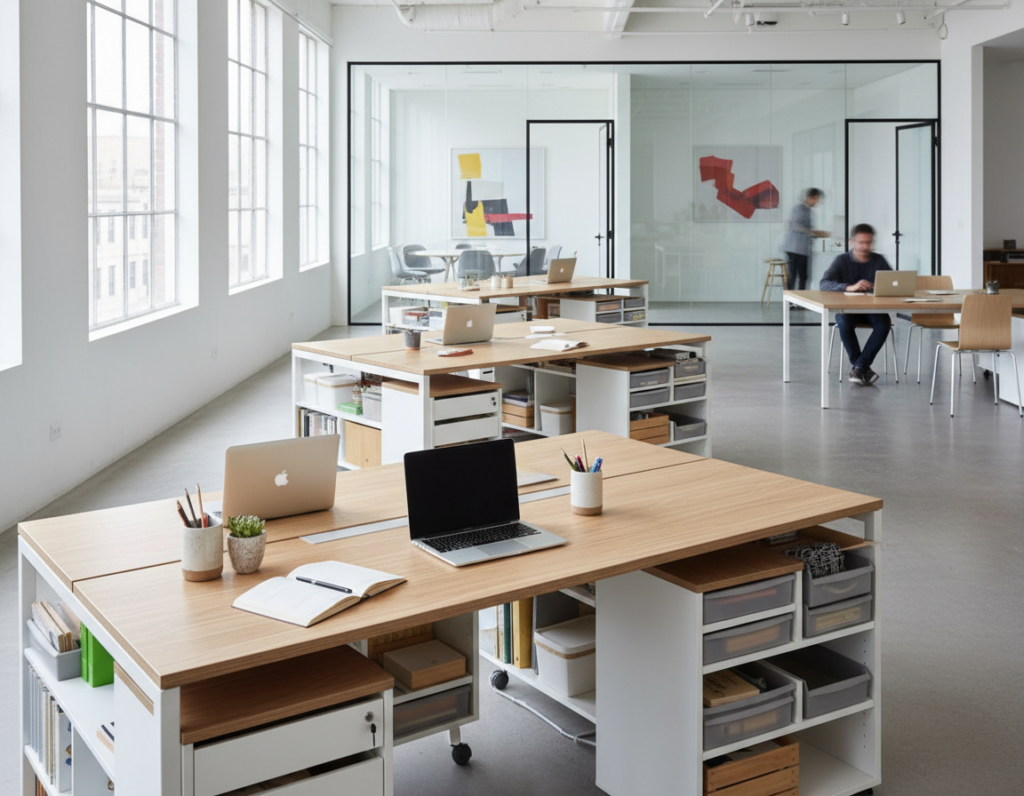
Add an external monitor for instant productivity gains
Connecting an extra display creates side-by-side space that keeps apps open and your flow intact. A larger monitor reduces constant window switching and helps you keep reference material visible while you work.
Why a bigger display beats constant window-switching
With more screen area you can place research, mail, and a document side‑by‑side. For example, write while research stays open, show a spreadsheet beside email, or keep chat visible during a meeting.
How to choose a monitor that matches your ports
Before you buy, check your laptop ports: common options are HDMI, DisplayPort, USB‑C, or Thunderbolt. Confirm the monitor has a compatible port or factor in a reliable adapter.
Prioritize a stable connection: a good cable prevents flicker, dropouts, and intermittent blank screens.
Used monitors as a budget-friendly upgrade
Buying used monitors from local marketplaces is a cost-effective route for occasional WFH. Pick a size that fits your desk and viewing distance—bigger is not always better.
“Many systems detect an external screen automatically once connected and powered on.”
- Core value: more virtual workspace, less switching.
- Check ports first; match or plan an adapter.
- Choose size for space and viewing distance, not just scale.
Set up a dual monitor workstation with a laptop
A dual-screen layout aims to keep your main work in clear view while the second screen handles references, chats, and tool windows. This approach reduces constant window switching and protects focus.
Layout options for limited and larger surfaces
Side-by-side monitors work best when you have horizontal room. They let you scan across two full screens without switching windows.
Monitor behind the laptop is a compact alternative. Place a full-size monitor centered behind the lower screen to keep posture neutral and save space.
Distance and height for all-day comfort
Start at an arm’s length from the display and step closer if text is too small. Move back if you find yourself leaning forward.
Align the top of each screen at or slightly below eye level. For displays over 30″, place your eye line in the upper third of the panel.
When vertical orientation helps
Turn one display vertical for long documents, code, or chat streams. A portrait display saves horizontal space and makes long text easier to read.
Matching screens and a quick workflow tip
Match color and brightness when possible. Similar panels reduce eye strain and make moving windows between screens less jarring.
- Pick one primary screen and center your keyboard and chair toward it.
- Use the second screen for reference apps, chat, or monitoring tools.
“Center your body to the primary display to avoid repeated torso twists and keep comfort steady.”
Monitor arms and stands: reclaim desk space and dial in ergonomics
Monitor arms turn awkward screen placement into repeatable, comfortable positions you can trust all day.
Adjustments that cut neck and shoulder strain
Height: set the top of the monitor at or slightly below eye level so the neck stays neutral.
Tilt: angle the screen slightly downward to keep your gaze at a gentle 10–20° and reduce strain.
Swivel and reach: use arm swivel to avoid overreaching and to position screens for comfortable shoulder alignment.
Mounting a dual monitor arm safely
Always follow safety steps: clamp or grommet the stand to the desk, verify the tabletop thickness, and confirm weight limits. Attach each monitor using its VESA holes and tighten all fasteners. Re-check stability before regular use.
Minimize glare and simplify cable management
- Tilt slightly downward and rotate screens away from bright windows to cut glare.
- Test angles at different times of day to catch reflections.
- Arms let you push monitors back to free desk space or pull them forward for detail work.
Check compatibility: confirm VESA pattern and weight rating before buying an arm. Once placement is solved, the next step is reliable connectivity — learn how to plug everything in with a clean, single-cable approach at a most ergonomic desk setup.
Connect your laptop to a monitor without guesswork
A clear connection path saves time and keeps your screen stable during long sessions. Follow a short checklist and you’ll avoid common signal problems.
Common display connections: HDMI, DisplayPort, USB-C, Thunderbolt
Identify ports first: check the computer port and the monitor input. Most systems use HDMI or DisplayPort. Modern models may use USB‑C or Thunderbolt, which can carry power and video on one cable.
How to select a high-quality cable for a stable signal
Choose a well-built cable to reduce flicker and dropouts during work. Look for braided jackets, solid connectors, and reviews that mention stable delivery at your target resolution and refresh rate.
Why quality matters: a higher-grade cable prevents intermittent loss and keeps meetings and editing sessions smooth.
Extend vs. mirror displays and when to use each
Extend mode gives you more workspace. Use it for side‑by‑side documents, research, or keeping notes visible while presenting on the main screen.
Mirror mode duplicates the screen. Use it for presentations, training, or when both viewers need the same content.
- Quick connection checklist: identify the laptop port, identify the monitor input, then choose the correct cable or adapter.
- Try HDMI or DisplayPort first; pick USB‑C/Thunderbolt when your device supports it.
- Troubleshoot: power on monitor, re‑seat the cable, try another input, then confirm OS display settings.
“Pick the right cable and the rest becomes routine.”
Next: MacBook specifics differ slightly — adapters and macOS display preferences will be covered in the following section.
MacBook monitor setup: adapters, settings, and troubleshooting
Connecting a MacBook to an external screen can be quick—if you match ports, cables, and macOS display settings first.
USB‑C and Thunderbolt basics
Most modern Mac models use USB‑C or Thunderbolt for video and power. Older machines may still accept HDMI, so check your machine’s ports before you buy adapters.
Adapter tip: match the monitor input and favor reputable hubs or branded adapters to avoid flaky connections.
Arrange displays to match your physical layout
Open System Settings > Displays and choose Arrangement. Drag the blue blocks so the on‑screen layout matches the real placement of your screens.
Center the primary monitor for long work sessions. Turn on Mirror Displays only when you need identical content on both screens.
Confirm detection and basic troubleshooting
- Connect the cable and power on the monitor.
- Go to Apple menu > System Settings > Displays to confirm the Mac sees the external monitor.
- If not detected: try a different cable or adapter, swap monitor inputs, then restart the computer.
“Once the monitor works, tidy cable routing and a repeatable docking routine keep the connection fast and reliable.”
Cable management that keeps your workspace clean and efficient
A few strategic cable moves transform a cluttered surface into a reliable, easy-to-use workspace. Good cable management is infrastructure: it prevents snags, speeds cleaning, and makes troubleshooting faster.
Bundle and route cables with Velcro straps and ties
Group cords by destination—monitor, power, and peripherals—and secure each group with Velcro straps. Velcro keeps changes simple and avoids cutting or redoing bundles later.
Hide power strips with trays and boxes
Use an under‑desk tray or a cable management box (IKEA Signum works well) to keep power strips off the floor. This protects plugs and keeps the floor clear for feet and chairs.
Design a “one-plug” docking routine
Use a single USB‑C or Thunderbolt hub to carry power, video, and peripherals. When you sit, plug one cable and you’re ready—less fumbling, less wasted time.
What to do when you still need wired connections
Some items stay wired—Ethernet, audio interfaces, or certain keyboards. Label both ends of these cables so you can swap or troubleshoot fast. Revisit cable routes after adding gear so your management stays intentional.
“Tidy cable routing is a small habit that pays back hours of easier use and less guessing.”
- Group by destination, not length.
- Run cables along the back edge and down one spine.
- Hide power strips under trays or inside boxes for safety.
Lighting your workspace to reduce eye strain and boost focus
The right light balances clarity for paper tasks and low glare for screens. Good lighting lowers eye strain, headaches, and fatigue during long work sessions. It also helps you look natural on video calls and keeps evening hours comfortable.
Use natural light without creating screen glare
Place the table perpendicular to windows when you can. This brings in daylight while reducing direct reflections on the screen. Use blinds or curtains at peak sun hours to cut harsh beams without losing daylight.
Desk lamp vs. monitor light bar for task lighting
Adjustable desk lamp is flexible for paper notes and side tasks. A lamp with dim and color controls adapts to different hours.
Monitor light bars (for example, BenQ ScreenBar or Xiaomi light bars) shine across the surface and minimize reflection on the display. They keep the workspace evenly lit with less screen glare.
Ambient lighting for long sessions and video calls
Soft background light reduces contrast between the bright screen and a dark room. Position key lights slightly in front and to the side of your face for clearer video without washing out the background.
“Light that matches your tasks keeps you comfortable and working longer.”
- Keep bright sources out of direct view of the screen.
- Use layered light: natural, task, and ambient.
- Match lighting to ergonomics so great monitors and chairs matter most when you can see comfortably.
Storage and organization systems that protect your flow
Clutter steals time—smart storage keeps your flow intact and your head in the work. Flow protection means fewer trips away from the chair to fetch things. That small reduction in interruptions preserves focus and momentum.
Keep daily-use items within reach
Use a simple rule: only daily items stay on the desk; everything else has a home. This makes starting and ending work fast and predictable.
Drawer organizers and mobile storage
Drawer organizers sort small tools: pens, adapters, and batteries. An under-desk drawer or mobile file cabinet keeps paper-heavy admin within reach without crowding the surface.
Maximize vertical space with pegboards and shelves
Pegboards and wall shelves free surface area while keeping gear accessible. Hang headphones, clip notes, or stow chargers on hooks to reclaim valuable square space.
Group items by task and protect gear
Organize by task—meeting items, writing tools, and charging gear—so you can reset in seconds. Label containers for cables and spare peripherals to prevent loss and downtime.
“When storage matches how you work, your workspace stays calm and efficient.”
Next: with storage solved, style choices can enhance focus without adding clutter.
Style meets function: desk setup design ideas that still perform
Style should help you work, not slow you down. Treat visual choices as tools that reduce friction and support habits. Pick one clear direction and buy with purpose so the space stays calm and consistent.
Minimalist designs that cut distractions
Keep only essentials. Use neutral colors, wireless peripherals, and a five-minute nightly reset to stop clutter from building. This routine protects focus and keeps the area ready each morning.
Compact home layouts for small spaces
Stack vertical storage, tuck a hub under the surface, and place the monitor for short viewing distance. Thoughtful routing and narrow shelves make a small space feel powerful.
Biophilic touches and natural materials
Introduce low‑maintenance plants and wood or stone accents. These elements calm the eye without crowding the surface and pair well with soft task lighting.
Tech‑heavy and gaming‑inspired approaches
- Tech‑heavy: multi displays, a single dock, and disciplined cable channels for maximum connectivity.
- Gaming-inspired: borrow ergonomic chairs, fast monitors, and tactile peripherals while keeping colors muted for calls.
- Include a standing desk where heavy daily use justifies the investment.
One clear tip: choose a single style direction so purchases stay consistent and the work area remains focused. Learn layout ideas and more at home office desk setup ideas.
Maintain your laptop productivity desk setup over time
A short ritual keeps your workspace ready and prevents small messes from slowing you down.
Daily five-minute reset to prevent clutter creep
Spend five minutes at the end of each day. Clear cups and papers, return items to storage, and align your keyboard mouse. Coil charging cords and place them in the charging zone so they are ready next morning.
Cleaning keyboards, mice, and high-touch surfaces
Once a week, wipe the surface, gently clean the monitor, and remove dust from vents. Use wipes and a small brush for the keyboard mouse to remove debris between keys and keep clicks responsive.
Refresh and personalize without adding distractions
Adopt a change-control habit: add one accessory at a time and remove anything unused. Keep personalization minimal — one plant or one photo — so visual comfort and focus stay strong.
Goal: a workstation that feels ready in minutes so you can start work with less setup time.
Conclusion
Finish strong: make small habits that preserve the benefits of a well-built workspace. Follow the sequence you read here: define goals, pick the right desk, lock in comfort, raise the screen, upgrade inputs, add a monitor or two, then refine with arms, connectivity, cable routing, lighting, and storage.
Instant wins: extra monitor space, correct screen height, and a one-plug docking routine cut daily friction fast. Choose the simplest setup that meets your needs—a single great monitor and tidy cables often beat cluttered multi-monitor office builds.
Next actions: verify monitor height, confirm extend or mirror settings, and do a five-minute reset at day’s end. A powerful workstation is maintained, not just built—small tweaks over time keep your work comfortable and effective.