Your goal is an organized desk that stays useful, not just tidy. Start with the rule: keep only what you need within arm’s reach.
Drawers get messy because high-traffic items pile up during busy days. Rushed work and “I’ll deal with it later” habits turn one compartment into a catch-all.
This guide sets clear expectations. You will reset the space, sort what’s inside, choose simple containers, and lock the system in place for home or office use.
Follow a core method: empty-out, category sorting, declutter choices, layout zones, the right containers, and easy maintenance like labels. Make function first—match storage to your workflow and reach patterns.
This advice fits anyone working in a shared workspace or a personal room. Use the phrase how to organize desk drawer efficiently as a compact reminder: one plan, repeatable steps, and a system that survives everyday use.
Reset Your Desk Drawer With a Fast, No-Regrets Empty-Out
Start by clearing one drawer completely so you can see every stray item that lives there. This single step ends the habit of rearranging around hidden clutter and helps you get started with a clean slate.
Decide what belongs within reach. Keep only daily-use tools at the front of the desk. Anything rarely used belongs elsewhere in the home or office.
- Create two quick piles: use at the desk and store somewhere else. Simple choices keep momentum high.
- While the drawer is empty, do a fast cleaning pass—wipe dust, remove crumbs, and check for ink stains.
- Note friction points: items that snag, slide, or topple. Those clues tell you what organizers and layout zones you will need next.
This reset is part of the overall process. You can’t build a lasting system until you actually see what takes up space. Treat this as the foundational step and move on once the piles and cleaning are done.
Sort Supplies Into Categories That Match How You Actually Work
A simple category plan makes reaching for an item fast and nearly reflexive. Start by grouping supplies by use, not by color or size. That shift keeps your desk clear and your workflow steady.
Create broad categories for small collections and specific ones for larger sets
Rule of thumb: If you own only a few pens and pencils, use one “writing” group. If you own many, split into pens, highlighters, markers, and pencils. This reduces decision fatigue when you open a drawer.
Group items like scissors, tape, clips, pens, and highlighters
List the high-frequency items that collect on most desks: scissors, tape, clips, pens, and sticky notes. Keeping tape with tape and clips with clips prevents duplicate buying and saves time.
Separate paper-related items from tools
Keep paper goods—sticky notes, stamps, envelopes, small notepads—away from tools like staplers and scissors. Clear separation prevents mixed piles and makes the next step, decluttering, much faster.
Quick check: If a category does not match the way you work (for example, you highlight daily but rarely use pencils), revise it before buying organizers. Once categories are set, duplicates and dead supplies stand out immediately, speeding cleanup and long-term organization.
Declutter What’s Broken, Dried Out, Duplicated, or Outdated
A focused, three-step purge removes broken, dried out, and duplicate items fast. Use this as a routine step that protects prime space for daily use.
Trash and recycle
Quick checklist: dead pens, dried markers, broken rubber bands, and outdated paper piles. Toss or recycle anything that won’t work again.
Relocate what rarely belongs at arm’s reach
Prime space means the front and top positions where you reach first. Move seldom-used tools into storage bins elsewhere in your home or office.
Create a small “relocate” bin so you don’t wander mid-session. That keeps momentum and saves time.
Donate or sell extras
Keep one or two of key office supplies accessible and store backstock out of the main drawers. Good-condition extras can be donated or sold.
- Fewer items mean organizers work better and last longer.
- Decluttering cuts search time and improves daily work life.
How to Organize Desk Drawer Efficiently With Layout Zones
Layout zones turn random piles into predictable spots where your hand finds what it needs. Zones reduce shuffling because your muscle memory learns where items live.
Front-to-back rule for a single drawer
Front positions are for daily essentials: pens, clips, sticky notes, and your most-used tape. Keep bulky, rare items at the back, such as spare stapler refills or extra batteries.
Frequency-based plan for multiple drawers
For multiple drawers, use a top-for-everyday, middle-for-weekly, bottom-for-rarely plan. This saves time. Open the top and get what you need without hunting through every drawer.
Stop the catch-all with defined zones
Give every category a clear place, even if that is a “relocate” or “archive” box. If you cannot name where something belongs in two seconds, refine the zone or category.
Tip: Design zones around the way you work, not trends. This small system change cuts clutter and keeps your desk drawers reliable for years.
Choose the Right Organizers, Trays, and Dividers for Your Space
Choose storage solutions that stop small tools from rolling, tangling, or vanishing under larger items. Let the shape of the container match the supplies you use most. This step cuts search time and keeps desktop clutter low.
Match shapes to items
Long, narrow trays are best for rulers and cutting tools. Small round or square cups hold clips and push pins. Medium compartments fit pens and tape without crowding.
Pick materials that suit your style
Acrylic inserts offer visibility. Bamboo brings warmth for a home office. Mesh containers are light and breathable for bulk storage.
Repurpose and adjust when needed
Muffin tins or jewelry boxes work well if they fit the internal measurements. For bulky items like scissors or staplers, use spring-loaded dividers or a simple DIY wooden divider.
- Measurement checklist: height clearance, internal depth, and width so the organizer does not snag or stop the drawer from closing.
- Choosing the right containers reduces desktop overflow and keeps more space free for active work.
For more practical ideas and a step-by-step shopping guide, see organize desk drawers.
Lock the System In Place So Drawers Stay Organized for Years
Small anchors and clear labels make an organized drawer last for years. Locking matters because even a tidy layout falls apart when bins slide and categories blur during a hectic work week.
Stop bins from sliding with museum gel or putty
Use tiny dabs of museum gel or putty under each corner of an organizer. The gel holds cleanly, lifts off without damage, and can be refreshed as part of future maintenance.
Placement and practical method
Apply gel to the bottom corners of each bin so the drawers open and close smoothly without shifting layouts. Refresh the gel when you rearrange or if you notice movement.
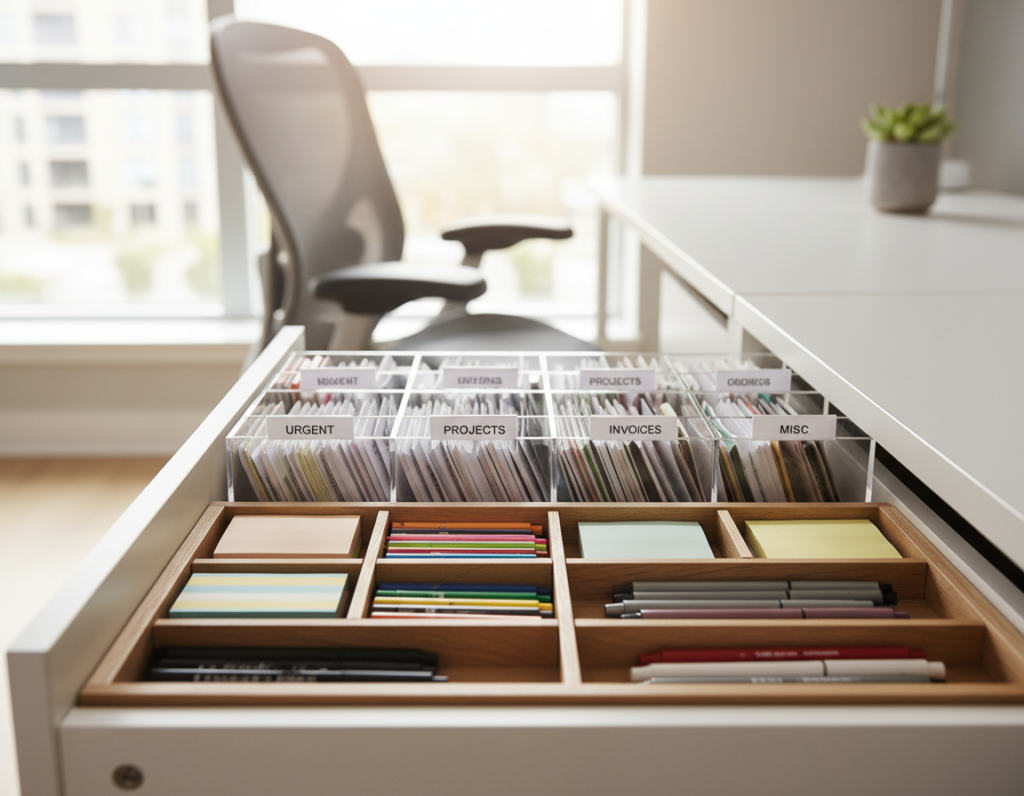
Label categories and zones for quick returns
Place labels where you can read them from above—on the inside lip—or on the container edge that faces you. Use label tape, a label maker, or a Cricut Joy-style cut for neat, durable results.
- Why this part matters: labels protect the system for years by making it easy for anyone sharing the space to return items correctly.
- Quick maintenance: if bins slide or items are misfiled, refresh gel and relabel before the mess compounds.
For a compact, practical take on keeping a small catch-all usable, see an organized junk drawer guide that pairs well with these steps.
Keep Problem Items Under Control: Cables, Paper, and Portable Work
Tangled cords and piling paper are the usual culprits that undo a neat workspace. Tame these three troublemakers and your organized desk lasts longer.
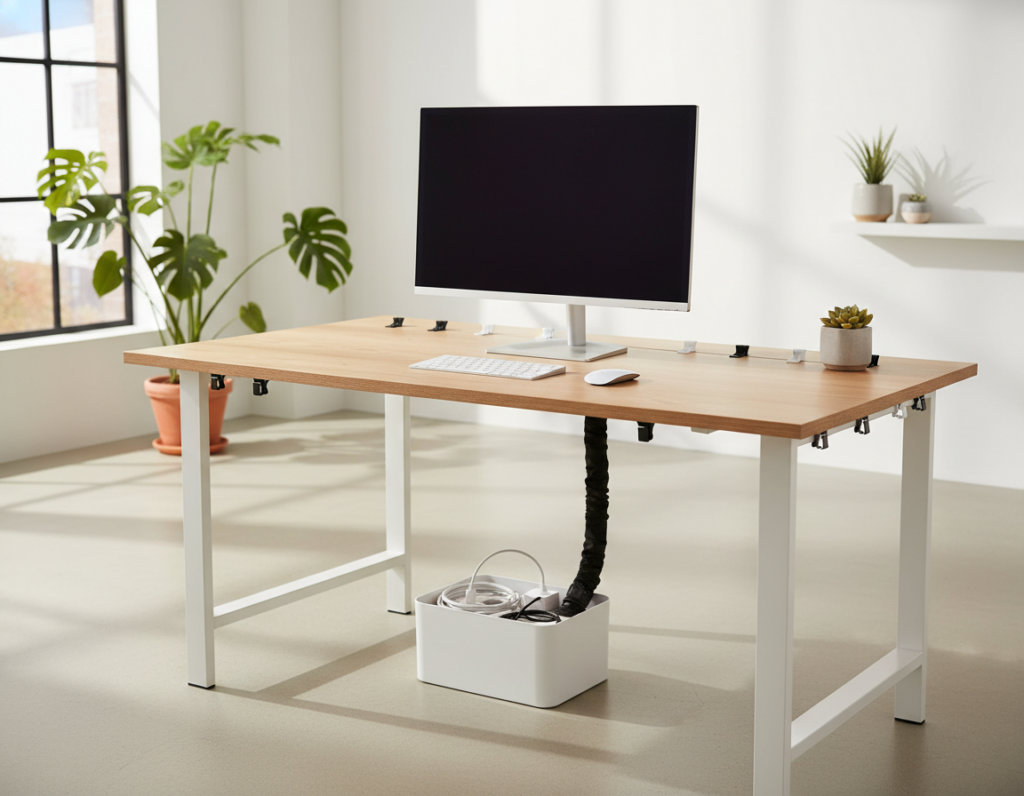
Bundle and label cords, earbuds, and chargers
Bundle first, label next. Use Velcro or twist ties for groups of chargers and earbuds. Add clear labels so you can grab the right cable without unwrapping bundles.
Create a simple paper system
Set an inbox, an outbox, and a high-priority tray within arm’s reach. Keep active paper that needs action in the priority tray, and file the rest.
Use portable storage for flexible work
Pick a portable file box or an accordion organizer for papers you move between rooms or the home office and a coffee table.
Archive long-term files off the desktop
Protect your desktop: separate “need now” from “need later.” Move older receipts and tax records (commonly kept three years) into labeled storage in a cabinet or second drawer.
- Bundle cords and add labels for quick ID.
- Keep paper flowing with inbox/outbox/high-priority trays.
- Use mobile storage so supplies don’t migrate back onto the desktop.
Conclusion
,
Protecting your main work drawer starts with simple rules you actually follow. Empty, sort, declutter, set clear layout zones, then add organizers that fit the space. Repeat those steps and the setup will hold.
Keep one rule: every supply has a home so you never use the drawer as a temporary dump. A weekly, two-minute check on your most-used drawer prevents small mess from becoming big clutter.
Pick one quick improvement today—add a single tray for writing tools or move rarely used items into offsite storage. Small moves make an organized desk and steady organization ideas stick in real life, whether in a home or shared office.