Quick wins for a more comfortable workday: poor keyboard positioning often shows up as sore wrists, a stiff neck, and a tired back. Over time, these issues can lead to chronic pain and repetitive stress that hurt focus and productivity.
This short guide defines a practical ergonomic setup: a keyboard and mouse position that keeps wrists neutral, shoulders relaxed, and spine upright. Small shifts in height or angle can change how your upper body loads while you type.
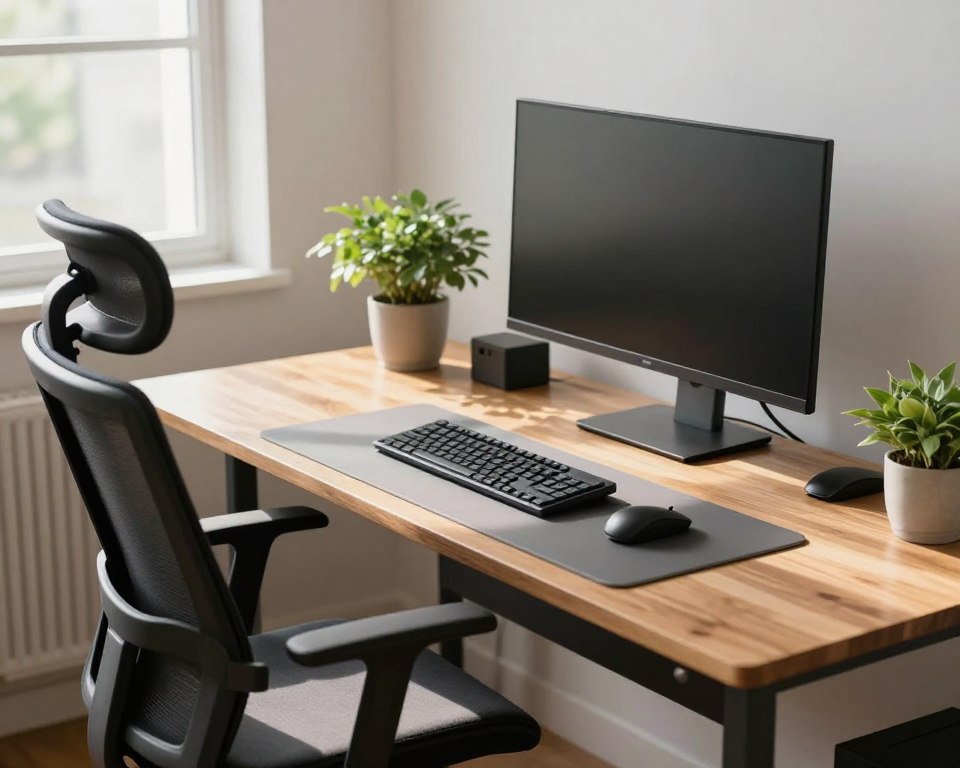
Expect a step-by-step approach. First, a neutral-body checklist. Next, height tweaks using chair, desk, or tray. Then mouse pairing and common fixes. These methods work for home and office, including shallow tops and sit-stand stations.
Try one change at a time and test it with a short typing session. That “test-and-tune” habit helps you find what reduces wrist and back discomfort and keeps you working with less strain.
Why Keyboard and Mouse Positioning Matters for Posture, Comfort, and Health
Small shifts in how you set up your input devices can stop aches and keep you working comfortably all day.
What starts as a minor nuisance often becomes a chain reaction. Bent wrists and constant reaching lead to forward head posture, rounded shoulders, and upper-back tension that grows worse across the day.
How poor setup causes wrist pain, neck strain, and repetitive injuries
Bent wrists and reaching for the mouse force muscles to work in awkward angles. Leaning forward to access keys increases neck and upper-back load. Over time, small repeated forces cause repetitive stress injuries — pain from repeated motion that builds into a chronic problem.
The productivity payoff of reducing fatigue and discomfort
Comfort matters for both people and business. When workers are not distracted by pain, they stay focused, make fewer errors, and keep steady output. Poor setups in an office or hybrid routine can drive lost hours and higher injury claims.
- Uneven shoulder tension happens when the mouse sits far from the typing area.
- Small repeated loads become big problems after hours of the same motion.
- The goal is neutral joints and minimized reach, not a one-size-fits-all fix.
Ergonomic Keyboard Placement Desk Basics: The Neutral-Body Checklist
A few simple checks will tell you whether your setup is adding strain or easing it. Do each step while seated and typing for a minute or two.
Neutral wrists check
Hands should sit in line with forearms — not bent up, down, or angled sideways. This neutral alignment lowers pressure in the carpal tunnel area and helps reduce symptom triggers over time.
90-degree elbow guideline
Aim for elbows near a 90-degree bend with upper arms relaxed at your sides. This supports the forearms and keeps shoulders from lifting or rounding, improving overall posture.
Centering and distance
Align the keyboard with the monitor you use most. If you split time between two screens, center the keyboard between them to avoid twisting the neck and upper body.
- Start 4–6 inches from the front edge, then type for a few minutes.
- If you lean forward, the device is too far; if wrists feel cramped, move it back slightly.
- Shallow surfaces can force hunching; deeper surfaces allow light forearm support without collapsing onto the surface.
Typing angle and shoulder audit
Most people type well with the board flat, but a slight negative tilt (sloping away) can help keep wrists straighter for some hand shapes.
Quick shoulder check: if your upper trapezius tightens or your shoulders creep up while typing, adjust position, distance, or height until they relax.
How to Set Keyboard Height Using Your Chair, Desk, and Keyboard Tray
Begin by setting your seat so your feet rest flat and your thighs feel supported. This base alignment changes how your arms and shoulders reach the keys. A correct chair height prevents you from hunching or leaning forward to type.
Then match hand level to your elbows: shoulders relaxed, elbows near a 90° bend, and forearms close to the sides. Your forearms should sit roughly parallel to the floor so your wrists stay neutral while you type.
Fixing the standard desk problem
Many fixed desks force a compromise: either your seat is wrong or your arms are too high. A good solution is an adjustable tray that brings the keys to the right height without changing chair support.
- Chair-first check: feet flat, knees bent, thighs supported.
- Height test: elbows at ~90°; no wrist bend up or down while typing.
- Back comfort: when correct, you sit upright without sliding forward to reach the keys.
What to look for in trays and products
Choose a tray with a generous height range, easy tilt (including negative angle), and solid stability under typing. An integrated or adjustable mouse surface helps keep both devices aligned and reduces reaching.
For standing setups, keep the same elbow and wrist relationships when you switch positions. Adjust the tray or surface so you do not type with shrugged shoulders.
“Small height changes can greatly reduce strain over long typing sessions.”
Materials matter: steel or phenolic trays offer durability, while wood or bamboo can be a greener option. Avoid high-VOC materials if indoor air quality is a concern.
For step-by-step tray adjustments and measured height ranges, see our keyboard tray height setup guide. Correct height reduces wrist stress, supports neutral posture, and lowers the risk of repetitive strain during long workdays.
Mouse Placement and Keyboard Pairing to Prevent Shoulder and Arm Strain
Place the mouse next to your main typing area to cut reach and shoulder strain. Keeping the mouse close keeps the mousing arm near the body, which lowers shoulder hiking and arm fatigue.
Why small gaps matter: even a few inches of extra reach creates uneven shoulder tension. That one-sided load grows during long sessions and can show up as tight shoulders or sore arms.
Bring devices closer to midline
Choose a compact layout such as tenkeyless or a compact full-size variant to shift the mouse inward. Removing the numpad often lets you mouse nearer your center without changing the surface area.
For number-heavy work, a detachable number pad gives you flexibility. Move it where it fits best and keep the mouse beside your hands for comfort and steady productivity.
Alternate input devices to reduce overuse
Try a vertical mouse or a trackball to vary muscle usage and reduce repetitive motion patterns. These devices change forearm posture and can ease common issues from prolonged mousing.
- Ideal relationship: mouse directly next to the typing zone so the arm stays relaxed.
- Rotation plan: switch between a traditional mouse and a trackball during the day to spread demand across muscles.
- Home and office tip: aim for “close, centered, and low-reach” regardless of surface size.
For more on practical pairing and adjustments, see our keyboard-mouse pairing guide.
Common Ergonomic Mistakes That Cause Wrist and Back Pain (and How to Fix Them)
Minor mistakes in how you sit and type often cause the most persistent discomfort. Below are the typical errors and quick fixes you can test in minutes.
Keyboard too high or too low: quick adjustments
Too high: wrists bend upward and press the carpal tunnel area. Too low: wrists bend down and strain tendons. Fix this by raising or lowering your chair first.
If that doesn’t help, add a keyboard tray or adjust desk height so elbows sit near 90° and wrists stay neutral.
Flat tilt and hard wrist resting
A flat or positively tilted board can force wrist extension. Try a slight negative tilt to align hands with forearms.
Avoid planting weight on a hard wrist rest. Use a soft pad only between bursts of typing, not as a brace during keystrokes.
Poor chair-and-desk pairing and skipped breaks
Feet-flat seating and supported thighs are non-negotiable. A mismatched chair ruins any good setup.
Build posture resets: wrist circles, shoulder squeezes, and gentle neck rolls. Follow the 20-20-20 rule to look away and move every 20 minutes.
“Small adjustments plus regular breaks protect long-term health and cut daily pain.”
For step-by-step tray tips, see our keyboard tray guide.
Conclusion
Finish by testing one change and noticing how your body reacts. Start with your chair, then set keyboard height, confirm distance, and keep the mouse close to the keys.
Neutral-body goals: wrists straight, elbows comfortably bent, shoulders relaxed, and the keyboard centered to your main monitor to avoid twisting.
If a fixed desk limits you, choose an adjustable tray and use monitor risers to keep screens at eye level. These products standardize fit across home and office setups and protect neck and overall health.
Re-check placement after any change and do a short typing test. Pick one improvement today—move the mouse closer, tweak distance, or adjust tilt—and note how you feel after an hour of work for better comfort and productivity.