Small, focused changes can cut strain and make long hours at a computer feel easier. This short guide shows clear steps you can try right now without buying a whole new office chair or accessories.
Start by fixing what supports you: adjust your chair first, then move to the desk and keyboard, set your screen at eye level, and check lighting and layout. Add regular movement breaks to keep muscles relaxed.
Neutral alignment means your neck rests straight, arms sit comfortably, and your spine is supported so muscles do less work. That is the goal, not rigid stillness.
This piece is for anyone who works at a computer and feels stiffness or fatigue by midday. Expect fast wins you can try today: feet supported, added lumbar support, screen height corrected, and keyboard placement closer to you.
Use this as a quick checklist to revisit when pain or tiredness returns. These simple fixes protect comfort and long-term health while fitting real workdays.
Why posture tweaks matter for comfort, health, and focus
Small shifts in how you sit and move can cut pain and sharpen focus within minutes. Many people work long hours and feel stiff by midday. Addressing common habits gives quick wins for comfort and long-term health.
Remote work surveys show this is urgent: about 41% report lower back pain and roughly 24% report neck pain. Those numbers add up because small, repeated habits create cumulative strain.
How poor habits cause neck strain and back pain
Reaching for the keyboard, craning toward the screen, and holding shoulders high force the neck and upper back to work harder.
Over hours these patterns irritate joints and muscles, increasing pain and reducing focus during the work day.
What a neutral position means in office ergonomics
Neutral position means joints stack, the spine keeps its natural curves, wrists stay straight, shoulders relax, and the head sits over the shoulders with the chin slightly tucked.
This low-effort alignment reduces strain and lowers the chance of flare-ups of back pain.
Why the best posture is your next posture
Even “perfect” posture should change. Move or stretch roughly every 30–60 minutes to reset muscles and breathe easier.
Micro-adjustments and short breaks stop stiffness and help the body stay energized across the day.
- Payoff: less neck strain, fewer back pain flare-ups, and steadier focus.
- Habit fix: keep frequently used items close to avoid reaching and twisting.
- Plan: fit the workspace to your body so comfort and health improve together.
Quick self-check: build a neutral spine from the floor up
Begin with your feet — a steady base makes the rest of the body easier to align. This short check takes about 60 seconds and helps you find a neutral spine before adjusting any equipment.
Feet flat on the floor or footrest to reduce fatigue
Place both feet flat on the floor or a footrest. Hold this for one minute and feel the base of support under you.
Why it matters: unsupported feet raise fatigue and make you slide forward or cross your legs. That breaks neutral position and strains the back.
Hips, knees, and ankles stacked in comfortable angles for support
Aim for hips, knees, and ankles in a gentle angle that stacks the joints. The body should feel supported, not perched.
When these angles are right, the spine needs less work to stay upright.
Relaxed shoulders and a gentle chin tuck to protect the neck
Let the shoulders drop down and back so the upper back rests rather than works constantly.
Then ease the chin slightly inward. This simple neck cue reduces forward-head strain without forcing a rigid stance.
- 60‑second self-check: feet contact the floor, hips and knees stacked, shoulders down, chin tucked.
- Once aligned, set chair height, desk height, and monitor level to match this position.
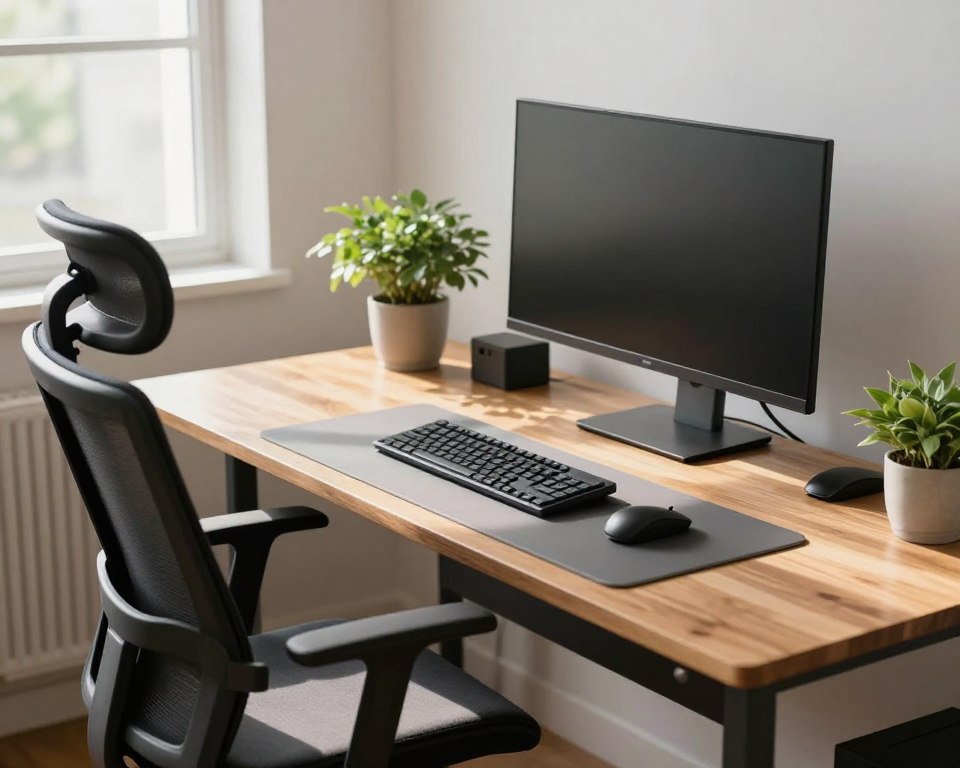
Ergonomic desk posture setup: set chair height and lumbar support first
Begin this step by making your chair the anchor of the workstation. Start with the seat before changing other items. A stable chair position reduces strain and makes small fixes clear.
Adjust chair height so feet are supported and pressure points ease
Raise or lower the chair until your feet feel grounded and weight spreads across the seat. Stop when knees are level or slightly lower than hips.
Check: knees should not be jammed upward. If they are, lower the seat until pressure eases.
Dial in seat depth to avoid leg discomfort behind the knees
Leave a 2–3 finger gap between the front edge of the seat and the back of your knees. This small distance reduces numbness and improves circulation.
Use lumbar support to maintain the natural “S” curve of the spine
Place lumbar support so it fills the small of the back. It should hold your lower back, not push you into an exaggerated arch.
Armrests that support forearms without hiking shoulders
Set armrests to a height that lets your forearms rest lightly while shoulders stay relaxed. Too-high rests cause a shrugged position and neck strain.
When a lumbar pillow or seat cushion beats buying a new chair
If a replacement chair is not an option, add a lumbar pillow or seat cushion. These quick fixes help you sit back into the backrest and restore comfort for long sessions.
- Step-by-step order: height → seat depth → lumbar → armrests.
- Recheck after 10–15 minutes of typing to confirm the position still feels supportive.
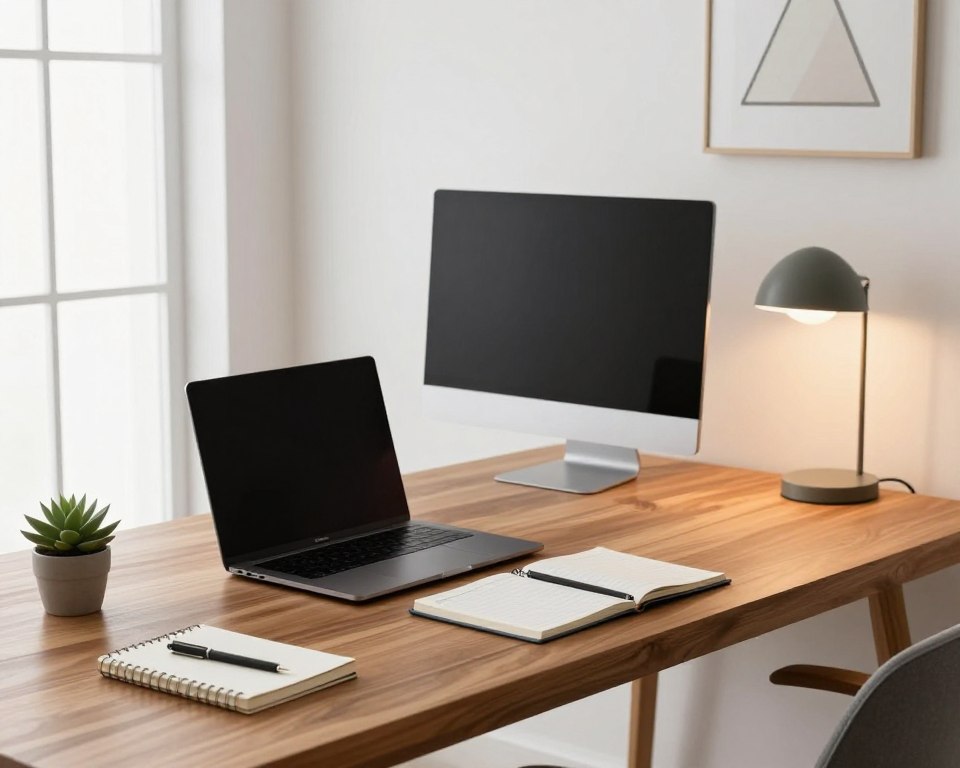
Desk and keyboard height: keep elbows close and wrists neutral
Match your keyboard height to your body so shoulders relax and wrists stay neutral. Typical desks (28–30 inches) sit too high for many people. That forces the arms forward and the shoulders up.
Find the target elbow level for typing and mouse use
Set keyboard and mouse so your elbows hang by your sides and forearms are roughly level. This reduces shoulder strain and keeps the wrist in a natural line.
Place the keyboard close and centered to reduce reaching
Keep the keyboard centered to your body and near the front of the work surface. Reach only with fingers, not the whole arm. Choosing a compact or split keyboard can cut shoulder tension.
Why pop-up keyboard feet often backfire
Raising a keyboard with its built-in feet tilts the keys. That increases wrist extension and long-term discomfort.
Lower the keyboard or raise the chair—two common fixes
- Install a keyboard tray to drop the keyboard and mouse lower.
- Or raise the chair and add a footrest so feet stay supported on the floor.
- Test both options to see which keeps shoulders relaxed and wrists straight.
Quick checklist: shoulders relaxed, elbows close, wrists straight, and mouse reachable without drifting the arm outward.
Mouse and input devices: reduce wrist strain and repetitive stress
Choosing the right mouse and where you put it makes a big difference for hand comfort. Repetitive use of a touchpad or an ill-fitting mouse can stress fingers, the wrist, and the arm.
How choice and placement matter: a mouse that sits too far from the keyboard forces reaching. That reach increases shoulder and wrist strain over time.
Pick a mouse that fits your hand
Size and shape should match your palm to reduce grip fatigue. Choose a mouse that lets your wrist rest in a neutral line and moves smoothly across the surface.
Fine-tune sensitivity
Raise pointer speed so you make fewer large motions. This lowers repetitive movement and reduces fatigue across the workday.
Alternatives for persistent pain
- Trackballs cut fine wrist motion by moving the ball with fingers.
- A stylus and graphics tablet keeps the hand neutral and may ease shoulder tension.
- Keep the pointer at the same height as the keyboard and as close as possible to avoid abducting the shoulder.
Quick 20‑minute test: after working for 20 minutes, your wrist should feel straight and the forearm and shoulders relaxed, not braced or sore. If pain or strain appears, try a different mouse or alter sensitivity.
Monitor and screen positioning: eye level, arm length away, less neck pain
A properly placed monitor helps your head stay stacked over your spine and your eyes stay relaxed. Small shifts in height and distance can reduce neck pain and eye strain during long computer sessions.
Set the top of the screen at eye level
Aim for the top of the screen to sit at eye level or 1–2 inches below. This keeps the head balanced and limits forward head tilt.
Find the right distance: about an arm’s length away
Place the monitor roughly an arm length away (about 20–40 inches). Then fine‑tune so text is sharp without leaning in.
Laptop tips: raise it and add an external keyboard
Raise a laptop on a stand or books so the screen meets eye level, and pair it with an external keyboard and mouse. That keeps the neck from collapsing toward the laptop.
Reduce glare with angle, lighting, and placement
Tilt the screen slightly to cut reflections, move the monitor so windows fall to the side, and use soft task lighting. These changes stop you from jutting your chin forward to read.
- Quick checks: eyes feel relaxed, neck is neutral, and you don’t lean forward to read.
- Test the monitor for 30 minutes during real work, then tweak height or distance as needed.
Lighting and layout: make the workspace easy on your eyes and body
Good lighting and a tidy layout keep your eyes relaxed and your body from overreaching. Strong, even light lowers the impulse to lean forward or tilt the head toward the screen. That preserves the alignment you set with your chair and monitor.
Blend natural light with task lighting to reduce eye strain
Use natural light when possible: daylight and a view let the eye rest and reduce fatigue throughout the day. When natural light is weak, add a focused lamp to balance brightness across the workstation.
Tip: place task lighting to the side to avoid screen glare and harsh shadows on documents.
Keep frequently used items within reach to avoid twisting your back
Arrange phone, notebook, and tools so you can access them without turning your torso. Reaching and twisting add cumulative strain to your back and neck.
Use a document holder to prevent repeated head and neck motion
Position a document holder at the same level and distance as the screen. This simple support stops repeated head nods and reduces neck moving between paper and the computer.
- Eye comfort check: reduce glare, lower high contrast, and keep the screen at a comfortable brightness so you don’t squint or lean.
- Layout quick wins: natural light + task lamp, items within arm’s reach, and a document holder aligned with the screen.
- Why it matters: good lighting and an efficient layout preserve the benefits of earlier chair and monitor adjustments and cut strain across the workday.
Instant reset habits: micro-breaks that prevent stiffness over time
Short, regular pauses for standing and stretching refresh the body and clear the mind. Make movement a simple habit so small strains don’t become lasting pain. These tiny resets work even when your chair and desk setup are already good.
Stand, stretch, and move regularly to counteract prolonged sitting
When to move: every 30–60 minutes, stand up, reset your posture, and move for 1–2 minutes. Use calls, emails, or water breaks as prompts so this fits into your day.
Simple desk-friendly movements for shoulders, neck, spine, and feet
Try shoulder rolls, gentle neck turns, seated spinal twists, and ankle circles. Do each move slowly for 30–60 seconds to loosen tight areas and cut fatigue.
How to alternate sitting and standing without trading back pain for foot pain
Shift gradually when using a sit‑stand surface. Start with short standing periods and add time in small steps so your feet and legs adapt.
- Core idea: posture is dynamic—micro-breaks are required to reduce pain over time.
- Stand and move for 1–2 minutes every 30–60 minutes during long work hours.
- Keep feet supported; prefer a firm surface or mat rather than prolonged hard standing on the floor.
Why it helps: frequent movement reduces stiffness, improves comfort, and stops fatigue from building across the day so you feel better and work sharper.
Conclusion
strong, actionable changes work best when you test them one at a time. Try a tweak—change monitor height, alter the chair lumbar, or move the keyboard—and do real work for 30 minutes to judge the result.
Follow the order you practiced: start with the chair and lumbar support, then set desk and keyboard height, adjust the mouse, position the monitor at eye level, fix lighting and layout, and add movement habits.
Quick checks: feet supported, back supported, shoulders relaxed, wrists neutral, monitor at eye level, and keyboard/mouse close.
Keep improving in small steps. Set reminders for micro-breaks and re-check the arrangement when you change chairs or locations. Many fixes come from low-cost aids like a lumbar pillow, footrest, or laptop stand. For more guidance on a full workstation approach see this most ergonomic desk setup.